Kubernetes 中的用户伪装功能

Kubernetes 中的用户伪装功能

用户伪装是 Kubernetes 原生提供的 User impersonation 功能,这个功能在管理集群时非常有用。

通常在管理系统中管理集群时,使用的都是集群管理员(cluster-admin)这样的高权限用户。当用户使用系统进行操作集群时,实际操作身份和集群权限并不匹配,这样很容易造成安全问题。

比如用户实际权限只有 Namespace 的操作,但通过集群管理系统部署 Helm 时,由于管理系统使用的集群管理员用户,如果 Chart 包里创建多个 Namespace 甚至是 ServiceAccount 就会造成越权。

通常会考虑在管理系统中做权限,但相当于有两套权限,很难保证做得面面具到,如果使用 Kubernetes 的用户伪装功能就可以完美解决这个问题。

原生用户伪装功能

Kubernetes 原生提供了以下请求头用于支持用户伪装:

  • Impersonate-User:伪装的用户名;
  • Impersonate-Group:伪装的组,可以同时传多个表示多个组,依赖 Impersonate-User
  • Impersonate-Extra-( extra name ):动态请求头,用于关联用户的 extra 字段,可选项。注意请求头的字段需要符合 HTTP Header 编码的要求,非法字符需要转换成 UTF-8 并进行 Percent-Encoding 编码;
  • Impersonate-Uid: 伪装用户的 Uid,可选项但依赖 Impersonate-User,对格式无要求但 1.22.0 以后版本才可用。

使用示例:

Impersonate 使用示例
1
2
3
4
5
6
7
8
Impersonate-User: jane.doe@example.com
Impersonate-Group: developers
Impersonate-Group: admins
Impersonate-Extra-dn: cn=jane,ou=engineers,dc=example,dc=com
Impersonate-Extra-acme.com%2Fproject: some-project
Impersonate-Extra-scopes: view
Impersonate-Extra-scopes: development
Impersonate-Uid: 06f6ce97-e2c5-4ab8-7ba5-7654dd08d52b

kubectl 可以使用 --as--as-group 来配置使用 Impersonate-UserImpersonate-Group 请求头:

kubectl 使用用户伪装
1
kubectl drain mynode --as=superman --as-group=system:masters

伪装权限授权

要使用伪装功能需要有 usergroupuid 等资源的 impersonate 权限:

伪装 user 和 group
1
2
3
4
5
6
7
8
apiVersion: rbac.authorization.k8s.io/v1
kind: ClusterRole
metadata:
name: impersonator
rules:
- apiGroups: [""]
resources: ["users", "groups", "serviceaccounts"]
verbs: ["impersonate"]

extra 字段和 uid 都是在 authentication.k8s.io 这个 APIGroup 下的,而且 extra 字段是 userextras 资源下的子资源。

比如下面角色配置允许伪装用户的 scopes 字段和 Uid

伪装 extra 和 uid 配置
1
2
3
4
5
6
7
8
9
apiVersion: rbac.authorization.k8s.io/v1
kind: ClusterRole
metadata:
name: scopes-and-uid-impersonator
rules:
# Can set "Impersonate-Extra-scopes" header and the "Impersonate-Uid" header.
- apiGroups: ["authentication.k8s.io"]
resources: ["userextras/scopes", "uids"]
verbs: ["impersonate"]

除了可以针对功能进行的权限限制外,RBAC 还支持对角色的伪装内容进行限制,比如限制只能伪装成某个用户:

对伪装内容进行限制
1
2
3
4
5
6
7
8
9
10
11
12
13
14
15
16
17
18
19
20
21
22
23
24
25
26
27
28
apiVersion: rbac.authorization.k8s.io/v1
kind: ClusterRole
metadata:
name: limited-impersonator
rules:
# Can impersonate the user "jane.doe@example.com"
- apiGroups: [""]
resources: ["users"]
verbs: ["impersonate"]
resourceNames: ["jane.doe@example.com"]

# Can impersonate the groups "developers" and "admins"
- apiGroups: [""]
resources: ["groups"]
verbs: ["impersonate"]
resourceNames: ["developers","admins"]

# Can impersonate the extras field "scopes" with the values "view" and "development"
- apiGroups: ["authentication.k8s.io"]
resources: ["userextras/scopes"]
verbs: ["impersonate"]
resourceNames: ["view", "development"]

# Can impersonate the uid "06f6ce97-e2c5-4ab8-7ba5-7654dd08d52b"
- apiGroups: ["authentication.k8s.io"]
resources: ["uids"]
verbs: ["impersonate"]
resourceNames: ["06f6ce97-e2c5-4ab8-7ba5-7654dd08d52b"]

APIServer 伪装处理

这里以 KubeVela 使用的 impersonate 组件为例,Cluster Gateway 基于 APIServer 的 Builder 实现的。

builder.APIServer.*.Build() 方法会调用 NewCommandStartWardleServer 生成一个 cobra.Command 实例,这个实例在运行时调用 RunWardleServer 启动 APIServer。

启动 APIServer
1
2
3
4
5
6
7
8
9
10
11
12
13
14
15
16
17
18
19
20
func (o WardleServerOptions) RunWardleServer(stopCh <-chan struct{}) error {
config, err := o.Config()
if err != nil {
return err
}

server, err := config.Complete().New()
if err != nil {
return err
}

server.GenericAPIServer.AddPostStartHookOrDie("start-sample-server-informers", func(context genericapiserver.PostStartHookContext) error {
if config.GenericConfig.SharedInformerFactory != nil {
config.GenericConfig.SharedInformerFactory.Start(context.StopCh)
}
return nil
})

return server.GenericAPIServer.PrepareRun().Run(stopCh)
}

这里第一行的 o.Config() 会初始化 HTTP 服务器的默认 FilterHandler 信息,我们关心的用户伪装处理就在里面生成,调用链如下:

o.Config() -> genericapiserver.NewRecommendedConfig() -> NewConfig() -> DefaultBuildHandlerChain

DefaultBuildHandlerChain 会用于初始化 GenericAPIServer

k8s.io/apiserver@v0.25.3/pkg/server/config.go:598
1
2
3
4
5
6
7
8
9
10
11
12
13
14
15
func (c completedConfig) New(name string, delegationTarget DelegationTarget) (*GenericAPIServer, error) {
// ...略

handlerChainBuilder := func(handler http.Handler) http.Handler {
return c.BuildHandlerChainFunc(handler, c.Config)
}

apiServerHandler := NewAPIServerHandler(name, c.Serializer, handlerChainBuilder, delegationTarget.UnprotectedHandler())

s := &GenericAPIServer{
Handler: apiServerHandler,
// ...略
}
// ...略
}

DefaultBuildHandlerChain 中通过 WithImpersonation 方法将 impersonation 注入 APIServer 的请求处理链中:

k8s.io/apiserver@v0.25.3/pkg/server/config.go:808
1
2
3
4
5
6
7
8
9
10
func DefaultBuildHandlerChain(apiHandler http.Handler, c *Config) http.Handler {
// ...略
handler = genericapifilters.WithImpersonation(handler, c.Authorization.Authorizer, c.Serializer)
handler = filterlatency.TrackStarted(handler, "impersonation")

handler = filterlatency.TrackCompleted(handler)
// ...略
handler = genericapifilters.WithAuthentication(handler, c.Authentication.Authenticator, failedHandler, c.Authentication.APIAudiences, c.Authentication.RequestHeaderConfig)
// ...略
}

WithImpersonation 函数中会使用 Authorizer 对当前用户进行权限校验:

staging/src/k8s.io/apiserver/pkg/endpoints/filters/impersonation.go:41
1
2
3
4
5
6
7
8
9
10
11
12
13
14
15
16
17
18
19
20
21
22
23
24
25
26
27
28
29
30
31
32
33
34
35
36
37
38
39
40
41
42
43
44
45
46
47
48
49
50
51
52
53
54
55
56
57
58
59
60
61
62
63
64
65
66
67
68
69
70
71
72
73
74
75
76
77
78
79
80
81
82
83
84
85
func WithImpersonation(handler http.Handler, a authorizer.Authorizer, s runtime.NegotiatedSerializer) http.Handler {
return http.HandlerFunc(func(w http.ResponseWriter, req *http.Request) {
// 从请求头中读取当前伪装信息
impersonationRequests, err := buildImpersonationRequests(req.Header)
if err != nil {
klog.V(4).Infof("%v", err)
responsewriters.InternalError(w, req, err)
return
}
// 不存在伪装信息直接跳过
if len(impersonationRequests) == 0 {
handler.ServeHTTP(w, req)
return
}

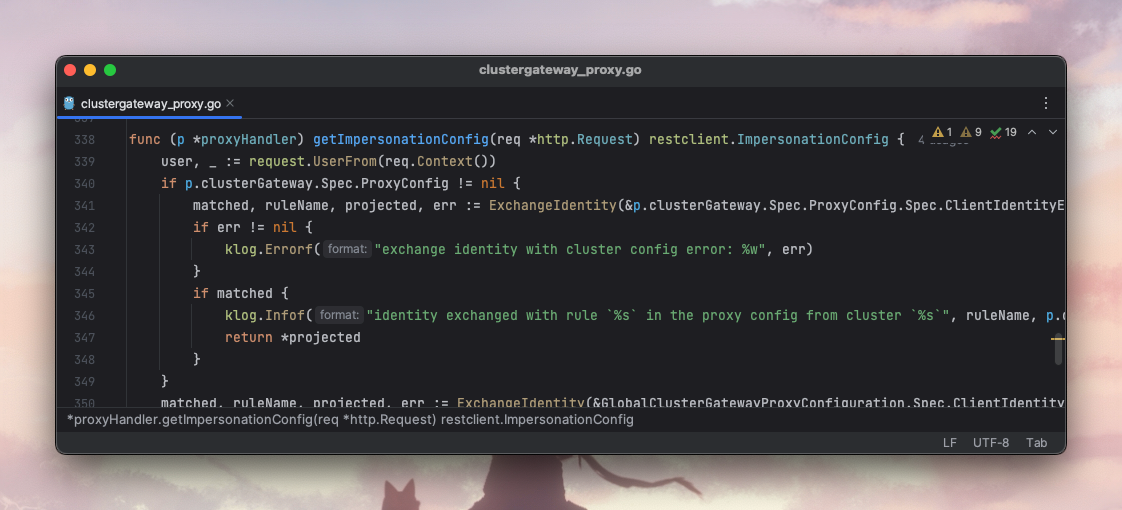
// 读取当前的用户信息
ctx := req.Context()
requestor, exists := request.UserFrom(ctx)
if !exists {
responsewriters.InternalError(w, req, errors.New("no user found for request"))
return
}

// if groups are not specified, then we need to look them up differently depending on the type of user
// if they are specified, then they are the authority (including the inclusion of system:authenticated/system:unauthenticated groups)
groupsSpecified := len(req.Header[authenticationv1.ImpersonateGroupHeader]) > 0

// make sure we're allowed to impersonate each thing we're requesting. While we're iterating through, start building username
// and group information
username := ""
groups := []string{}
userExtra := map[string][]string{}
uid := ""
for _, impersonationRequest := range impersonationRequests {
gvk := impersonationRequest.GetObjectKind().GroupVersionKind()
actingAsAttributes := &authorizer.AttributesRecord{
User: requestor,
Verb: "impersonate",
APIGroup: gvk.Group,
APIVersion: gvk.Version,
Namespace: impersonationRequest.Namespace,
Name: impersonationRequest.Name,
ResourceRequest: true,
}

// ... 太长略过,这里组装权限校验请求
// 进行权限校验
decision, reason, err := a.Authorize(ctx, actingAsAttributes)
if err != nil || decision != authorizer.DecisionAllow {
klog.V(4).InfoS("Forbidden", "URI", req.RequestURI, "Reason", reason, "Error", err)
responsewriters.Forbidden(ctx, actingAsAttributes, w, req, reason, s)
return
}
}

// ...略掉部分逻辑
// 替换用户信息到请求的 ctx 中
newUser := &user.DefaultInfo{
Name: username,
Groups: groups,
Extra: userExtra,
UID: uid,
}
req = req.WithContext(request.WithUser(ctx, newUser))

oldUser, _ := request.UserFrom(ctx)
httplog.LogOf(req, w).Addf("%v is acting as %v", oldUser, newUser)

ae := audit.AuditEventFrom(ctx)
audit.LogImpersonatedUser(ae, newUser)

// 清除伪装头
// clear all the impersonation headers from the request
req.Header.Del(authenticationv1.ImpersonateUserHeader)
req.Header.Del(authenticationv1.ImpersonateGroupHeader)
req.Header.Del(authenticationv1.ImpersonateUIDHeader)
for headerName := range req.Header {
if strings.HasPrefix(headerName, authenticationv1.ImpersonateUserExtraHeaderPrefix) {
req.Header.Del(headerName)
}
}

handler.ServeHTTP(w, req)
})
}

由代码中可以理解到 APIServer 实现用户伪装的原理:

  • 首先从请求头中读取当前伪装信息,不存在伪装信息直接跳过;
  • 读取当前的用户信息,并对当前用户进行 impersonate 权限的校验,权限不满足会报错;
  • 替换伪装用户信息到请求的 ctx 中;
  • 记录审计信息并删除伪装请求头。

当请求到达用户的资源处理代码时,使用 request.UserFrom(ctx) 获取到的用户既是已经伪装过的用户信息。如果没有配置伪装信息,那取得的就是原有用户信息。

执行完 WithImpersonation 的 Handler 后,后面会调用 WithAuthentication 对最终的用户权限进行校验。

利用用户伪装功能

除了 APIServer 本身对用户伪装功能的实现外,其它的一些开源组件也基于用户伪装功能做了一些功能扩展,就比如 KubeVela 的 Cluster Gateway 网关代理。

Cluster Gateway 基于 APIServer 框架开发,使用的 Kubernetes APIServer 内部的 Web 组件,同时利用 apiserver 的 APIServer aggregation 功能实现了 API 网关请求代理。

Cluster Gateway 在将代理的请求进行伪装前还会判断一下两个条件,满足其中一个才会进行伪装:

  • URL Query 是否提供了 impersonate=true 参数;
  • 启动时是否启用了 ClientIdentityPenetration 特性。
pkg/apis/cluster/v1alpha1/clustergateway_proxy.go:200
1
2
3
4
5
6
7
8
9
10
11
12
13
14
15
16
17
18
19
20
21
22
23
24
25
26
27
28
29
30
31
32
func (p *proxyHandler) ServeHTTP(writer http.ResponseWriter, request *http.Request) {
// ...略

cfg, err := NewConfigFromCluster(request.Context(), cluster)
if err != nil {
responsewriters.InternalError(writer, request, errors.Wrapf(err, "failed creating cluster proxy client config %s", cluster.Name))
return
}
// 判断是否进行伪装
if p.impersonate || utilfeature.DefaultFeatureGate.Enabled(featuregates.ClientIdentityPenetration) {
cfg.Impersonate = p.getImpersonationConfig(request)
}
// 使用配置构造 RoundTripper
rt, err := restclient.TransportFor(cfg)
if err != nil {
responsewriters.InternalError(writer, request, errors.Wrapf(err, "failed creating cluster proxy client %s", cluster.Name))
return
}
// 生成代理
proxy := apiproxy.NewUpgradeAwareHandler(
&url.URL{
Scheme: urlAddr.Scheme,
Path: newReq.URL.Path,
Host: urlAddr.Host,
RawQuery: request.URL.RawQuery,
},
rt,
false,
false,
nil)
// ...略
}

getImpersonationConfig 方法中实现了 Cluster Gateway 的用户信息交换逻辑,可以基于配置的规则将伪装的用户换成另外的用户。

restclient.TransportFor() 方法根据提供的配置来构造 RoundTripper,内部最后调用 HTTPWrappersForConfig 实现:

k8s.io/client-go@v0.25.3/transport/round_trippers.go:39
1
2
3
4
5
6
7
8
9
10
func HTTPWrappersForConfig(config *Config, rt http.RoundTripper) (http.RoundTripper, error) {
// ...略
if len(config.Impersonate.UserName) > 0 ||
len(config.Impersonate.UID) > 0 ||
len(config.Impersonate.Groups) > 0 ||
len(config.Impersonate.Extra) > 0 {
rt = NewImpersonatingRoundTripper(config.Impersonate, rt)
}
return rt, nil
}

HTTPWrappersForConfig() 函数判断配置是否有 Impersonate 的伪装信息,如果有的话使用 NewImpersonatingRoundTripper 进行包装,内部实现处理的代码如下:

k8s.io/client-go@v0.25.3/transport/round_trippers.go:241
1
2
3
4
5
6
7
8
9
10
11
12
13
14
15
16
17
18
19
20
21
func (rt *impersonatingRoundTripper) RoundTrip(req *http.Request) (*http.Response, error) {
// use the user header as marker for the rest.
if len(req.Header.Get(ImpersonateUserHeader)) != 0 {
return rt.delegate.RoundTrip(req)
}
req = utilnet.CloneRequest(req)
req.Header.Set(ImpersonateUserHeader, rt.impersonate.UserName)
if rt.impersonate.UID != "" {
req.Header.Set(ImpersonateUIDHeader, rt.impersonate.UID)
}
for _, group := range rt.impersonate.Groups {
req.Header.Add(ImpersonateGroupHeader, group)
}
for k, vv := range rt.impersonate.Extra {
for _, v := range vv {
req.Header.Add(ImpersonateUserExtraHeaderPrefix+headerKeyEscape(k), v)
}
}

return rt.delegate.RoundTrip(req)
}

impersonatingRoundTripper 的实现原理是将传入的 impersonate 配置设置到请求头中,最终请求发往纳管集群的 APIServer。

Cluster Gateway 的 impersonatingRoundTripper 和 KubeVela 中使用的 impersonatingRoundTripper 并不是同一个。KubeVela 中的 impersonatingRoundTripper 会修改 URL Query 信息且不支持 Extra 字段伪装;而这里的单纯配置请求头,是 client-go 原生提供的实现。

总结

本文简单介绍了 Kubernetes 中用户伪装功能和 APIServer 中的实现,以及在 KubeVela Cluster Gateway 中利用这个功能做的扩展。

伪装用户功能不仅能用于权限的限制,还可以在 extra 字段中加入用户的额外信息,并通过审计日志功能记录当前操作人,实现全链路操作审计。

下篇文章我们看一下 KubeVela 是如何利用用户伪装功能的。

作者

Jakes Lee

发布于

2023-06-16

更新于

2023-07-05

许可协议

评论